Six Day Road Trip Through Southern Utah
Six Day Road Trip Through Southern Utah
Where to Eat, Sleep, & Hike in the Zion & Bryce Canyon Region
Published: August 1, 2021
There’s something grounding about a road trip in the American West - the long empty stretches of highway, the slow shift in light and color as you move from one landscape to the next. Southern Utah, especially, has a way of quieting whatever urgency you arrived with. The land sets its own pace, and if you let it, you start to move a little differently too.
This trip wasn’t spontaneous. Campgrounds and hotels book out months in advance now, and national parks require a bit more intention than they once did. I’ve learned to plan the anchor points - flights, lodging, a few key hikes - and leave the rest open. That balance makes room for both wonder and rest.
I’ll admit, I like planning trips, at least to a point. It helps me get excited about what’s ahead. But I also have a tendency to over-research and worry about missing something worthwhile. This guide is the distilled version of that impulse: what we did, what we loved, what we’d skip next time, and what I’d recommend if you have a few days to explore this region.
We gave ourselves six days. It felt right — long enough to experience both Bryce Canyon and Zion without rushing, and slow enough to leave space for early mornings, quiet hikes, and a few unplanned detours that ended up being the moments we remembered most.

6-Day Itinerary
Las Vegas -> Bryce Canyon -> Zion -> Las Vegas
Day One: Arrival + Scenic Drive to Bryce
Fly into Las Vegas Harry Reid International Airport (formerly McCarran) and pick up your rental car. From there, it’s about a four-hour drive to Bryce Canyon—but there’s no need to rush. Stop for a bite, stock up on snacks and water (road trip essential, obviously), and settle in for a scenic ride. The highlight for me was driving through Red Rock Canyon on Scenic Byway 12, where the road winds through a series of stunning red rock arch tunnels—the gateway to Bryce. Completely unexpected and totally spectacular.
Once you arrive, check into your hotel and take a walk around. Compared to Zion, Bryce feels quieter, more nostalgic—less built up, more rooted in that classic National Park charm. We skipped a sit-down dinner and instead grabbed cereal and sandwich supplies from the General Store to eat back at the hotel. After a long travel day, turning in early is a good call—you’ll want to be up before sunrise.


Day Two: Sunrise + Hoodoo Hiking
Waking up for sunrise isn’t exactly fun — especially after a travel day — but in national parks, it’s almost always worth it. The light is softer, the air is cooler, the crowds are thinner, and the whole place feels calmer. Bryce Canyon, in particular, really comes alive in the early hours.
We left our hotel about thirty minutes before sunrise. That gave us time to get into the park, find parking, and walk to an overlook without rushing. Both Sunrise Point and Sunset Point have great sunrise views (the names are misleading), and they’re conveniently located near the trailheads for the morning hike. Note for early entrance: If you arrive very early, the entrance booth may not be staffed yet. In our experience, you can usually pay when you exit later in the day. We used an Annual Parks Pass.
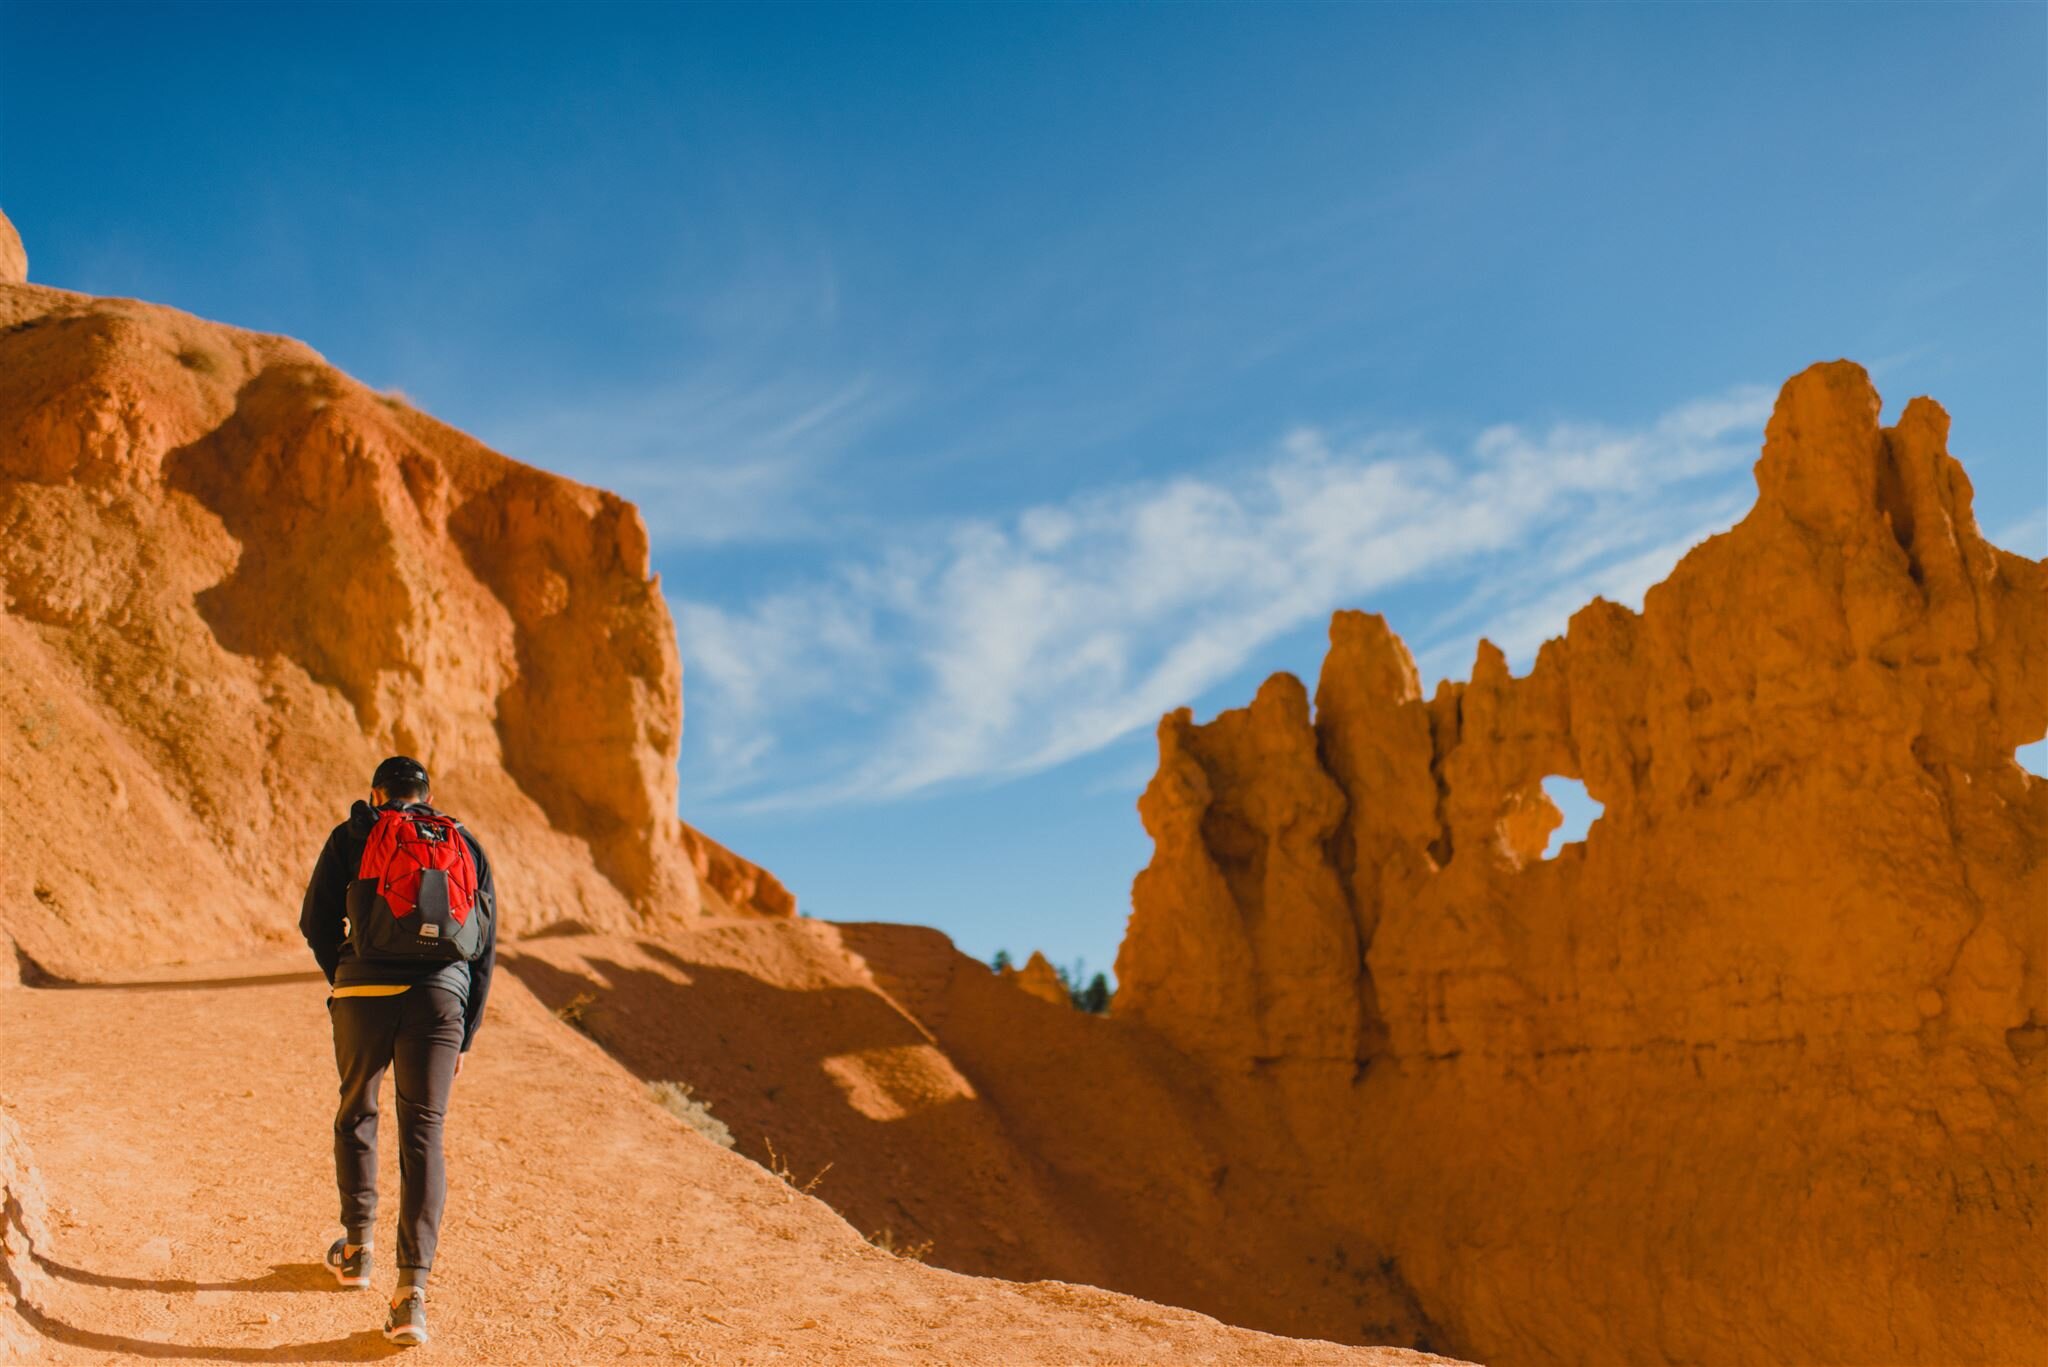
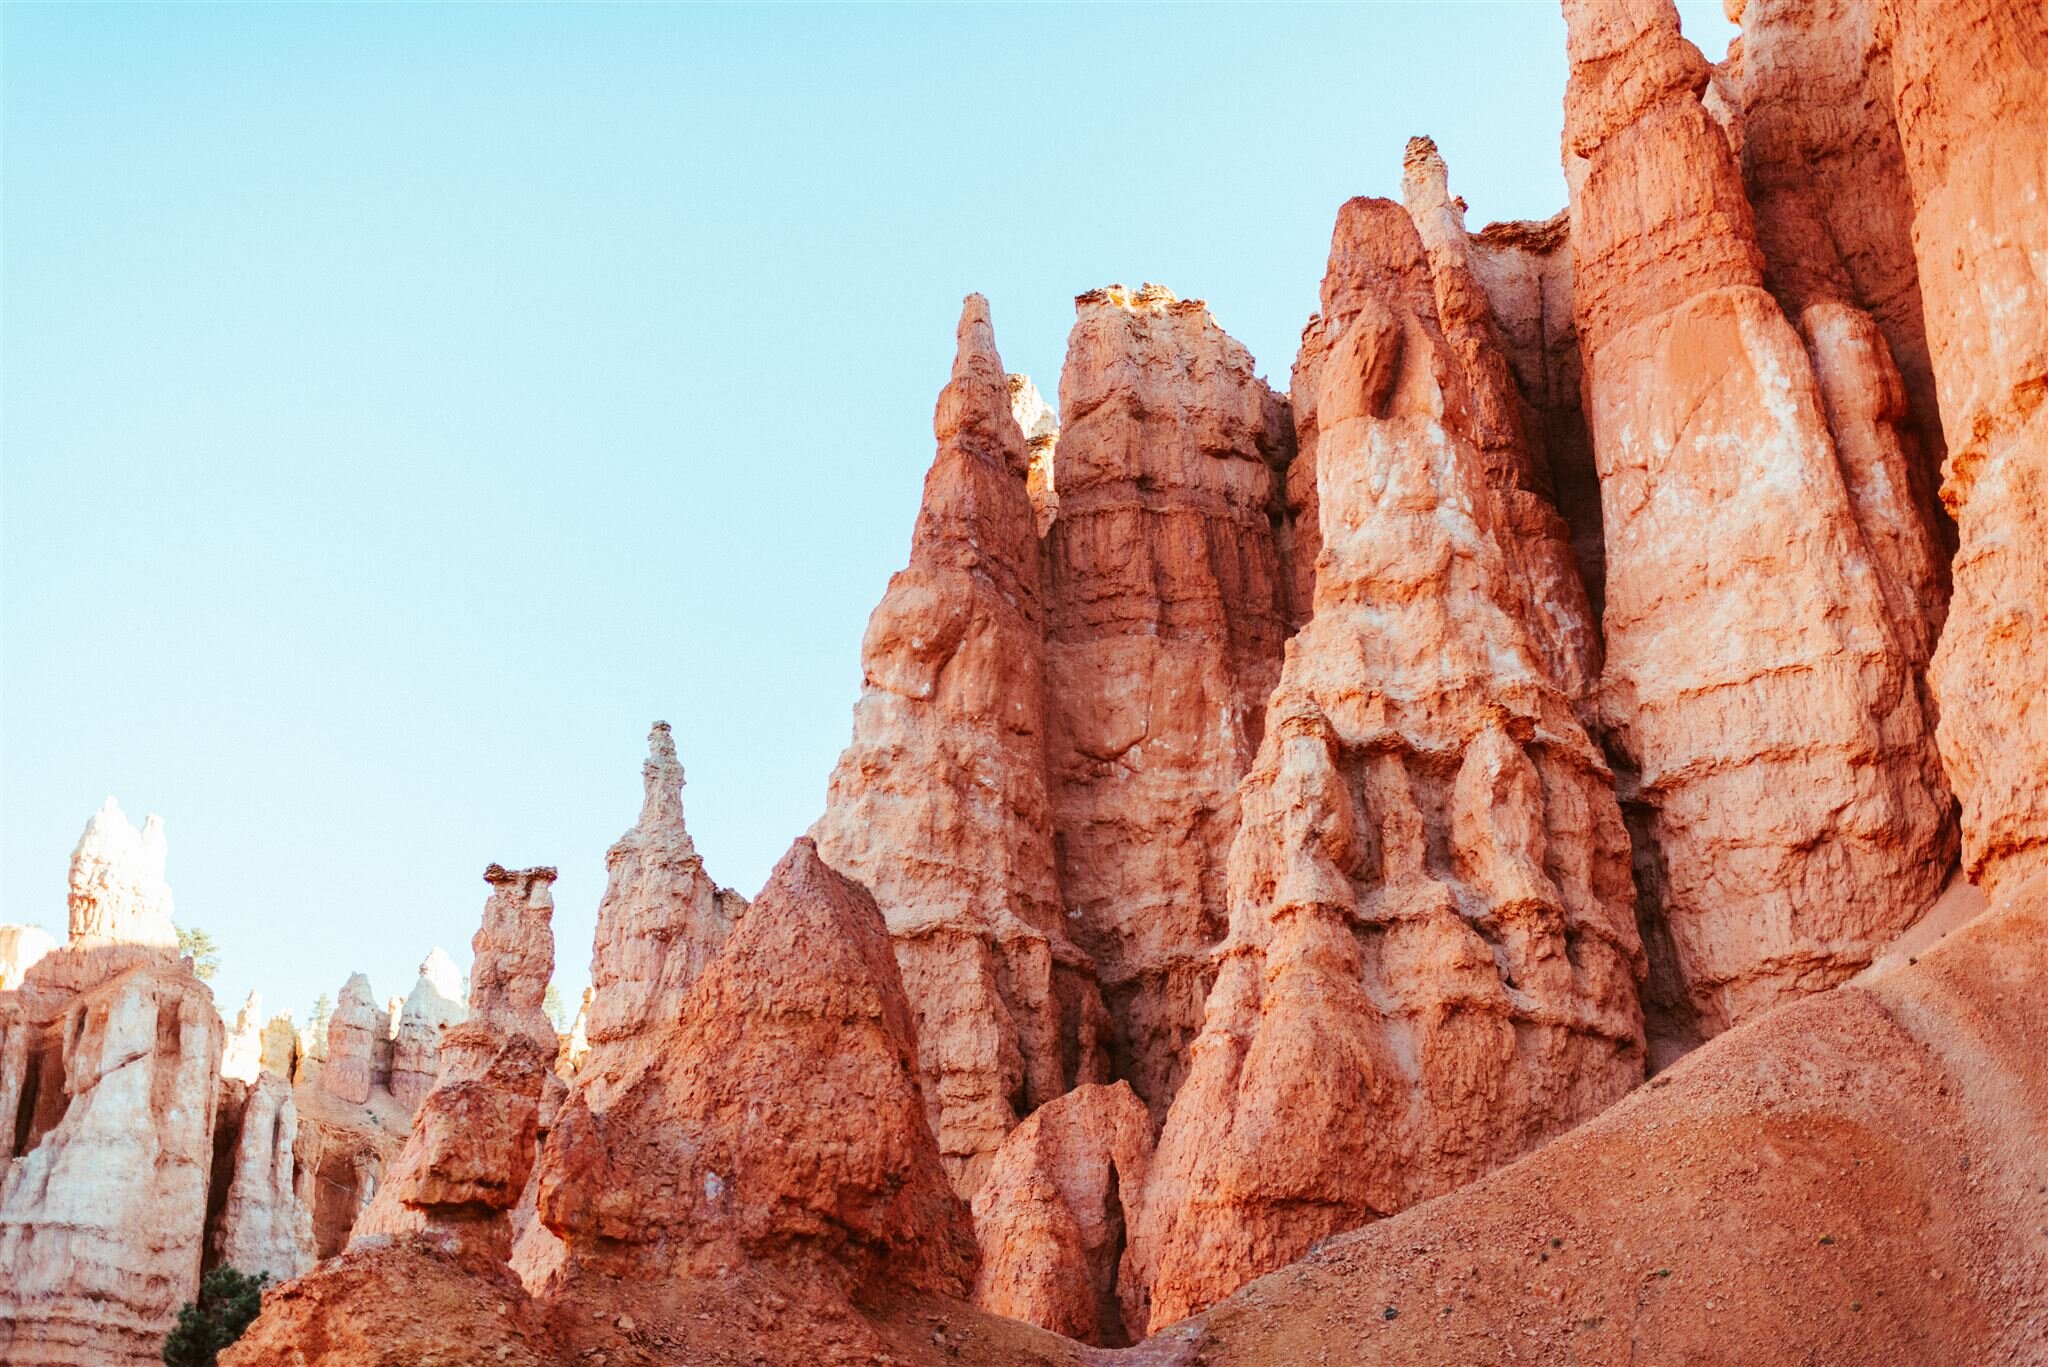
As the sun came up, the amphitheater shifted through layers of color — pale pinks, warm golds, and deeper reds settling into the hoodoos like embers. It felt hushed and almost reverent, the kind of quiet that makes you lower your voice without realizing it.
After sunrise, we headed straight onto the Queen’s Garden and Navajo Loop Trail. This is one of those hikes that delivers a lot in a short distance — hoodoos, switchbacks, wide views, and that feeling of being dropped right into the heart of the amphitheater. It’s just under three miles and relatively easy, but plan on one to two hours if you’re stopping for photos or just standing still, trying to take it all in.
Most of the sunrise crowd heads back to their hotels for breakfast, which makes this a surprisingly quiet time to be on the trail. The path winds between towering stone spires, and at certain turns the canyon opens wide enough to make you stop without any logical reason other than awe.
After the hike, we drove the scenic road through the park, pulling off at overlooks along the way. The major viewpoints get crowded by mid-day, but the smaller pull-outs still offer beautiful views, and people tend to cycle through quickly.
If you have extra time, Fairyland Loop is another popular hike, though we didn’t manage to fit it in. Before leaving Bryce, we stopped at the visitor center to learn more about the geology and history of the hoodoos.
Then it was back on the road toward Zion — about a one-to-two-hour drive depending on the season and traffic. You enter Zion through the East Entrance and drive through the Mt. Carmel Tunnel, a 1.1-mile stretch cut directly through the rock. You catch glimpses of the canyon through the tunnel’s windows, and when you exit, the views open up dramatically, like the landscape is being revealed all at once.
Note: If you’re driving an RV or campervan over a certain size, you’ll need to pay a $15 fee and get a tunnel permit at the entrance station (fee as of date this was published).
We exited the park at the south entrance into Springdale, checked into our hotel, grabbed dinner, and called it an early night. Day three was another early start.

Day Three: Narrows Day! (Or Angels Landing, if you’re feeling brave)
These are the two marquee hikes in Zion, and both are popular for good reason. I’d recommend choosing just one for your first full day in the park — especially if you’re not trying to turn your vacation into an endurance test. For the sake of this itinerary, we’ll stick with the Narrows (our pick), but the early-start advice applies to either.
It’s another early morning. From May through September, Zion runs a shuttle system through the main canyon, and the first one usually leaves the Visitor Center at 6 a.m. You’ll want to be on that, or as close to it as you can manage. The earlier you go, the quieter it is, and the more spacious the experience feels.
Depending on where you’re staying, you can drive, take the Springdale shuttle, or walk to the Visitor Center. Either way, aim to arrive early. Once you’re on board, ride the shuttle all the way to the last stop: Temple of Sinawava.
This is your first real look at the heart of Zion — the section closed to private vehicles — and even from the shuttle windows, it’s quietly breathtaking. The canyon walls rise higher and closer as you go, narrowing the sky into a thin blue ribbon overhead.
From Temple of Sinawava, take the Riverside Walk, a paved, easy mile that follows the river into the canyon. It’s gentle and scenic, and it eases you into what comes next. When the pavement ends, the real hike begins.
From here on out, you’re in the river. Literally.
The Narrows is a hike through the Virgin River, not beside it. The bottom is rocky and uneven, and the water depth varies — anywhere from ankle to waist, sometimes higher depending on conditions. It’s slow going, but that’s part of the experience.
Wear shoes with good grip (closed-toe — no flip flops), quick-dry clothes, and bring a hiking stick or two if you can. We didn’t rent the specialty wading gear that a lot of people use — we were fine without it, even in chilly May water — but I was very grateful for layers and a dry bag for my camera.
Pro tip: don’t skip the dry bag. You think you’ll stay upright until suddenly, you don’t.
This is an out-and-back hike, so you can turn around whenever it feels right. The full route is up to 9.4 miles round-trip, but you definitely don’t need to do the whole thing to get the experience. Even a couple of miles in is enough to feel immersed.
If you can, try to make it to Wall Street — the iconic stretch where the canyon narrows dramatically and the walls rise so high they block out most of the light. The water darkens, the sound changes, and everything feels quieter and more contained, like you’ve stepped into a cathedral carved by time.
The Narrows is considered strenuous by the National Park Service, so trust your body and your instincts. Check the weather and river conditions carefully before you go — flash floods are a real risk here — and don’t push it if conditions aren’t right. This is a place that rewards patience and respect more than ambition.
Once you’ve had your fill, turn back the way you came, hop the shuttle back to the Visitor Center, and let the afternoon unfold slowly.
Whether that means a nap, wandering Springdale, grabbing a long meal, or just sitting somewhere quiet and doing nothing at all is up to you. After a morning like that, anything restful feels like the right choice.

Day Four: Bike Zion
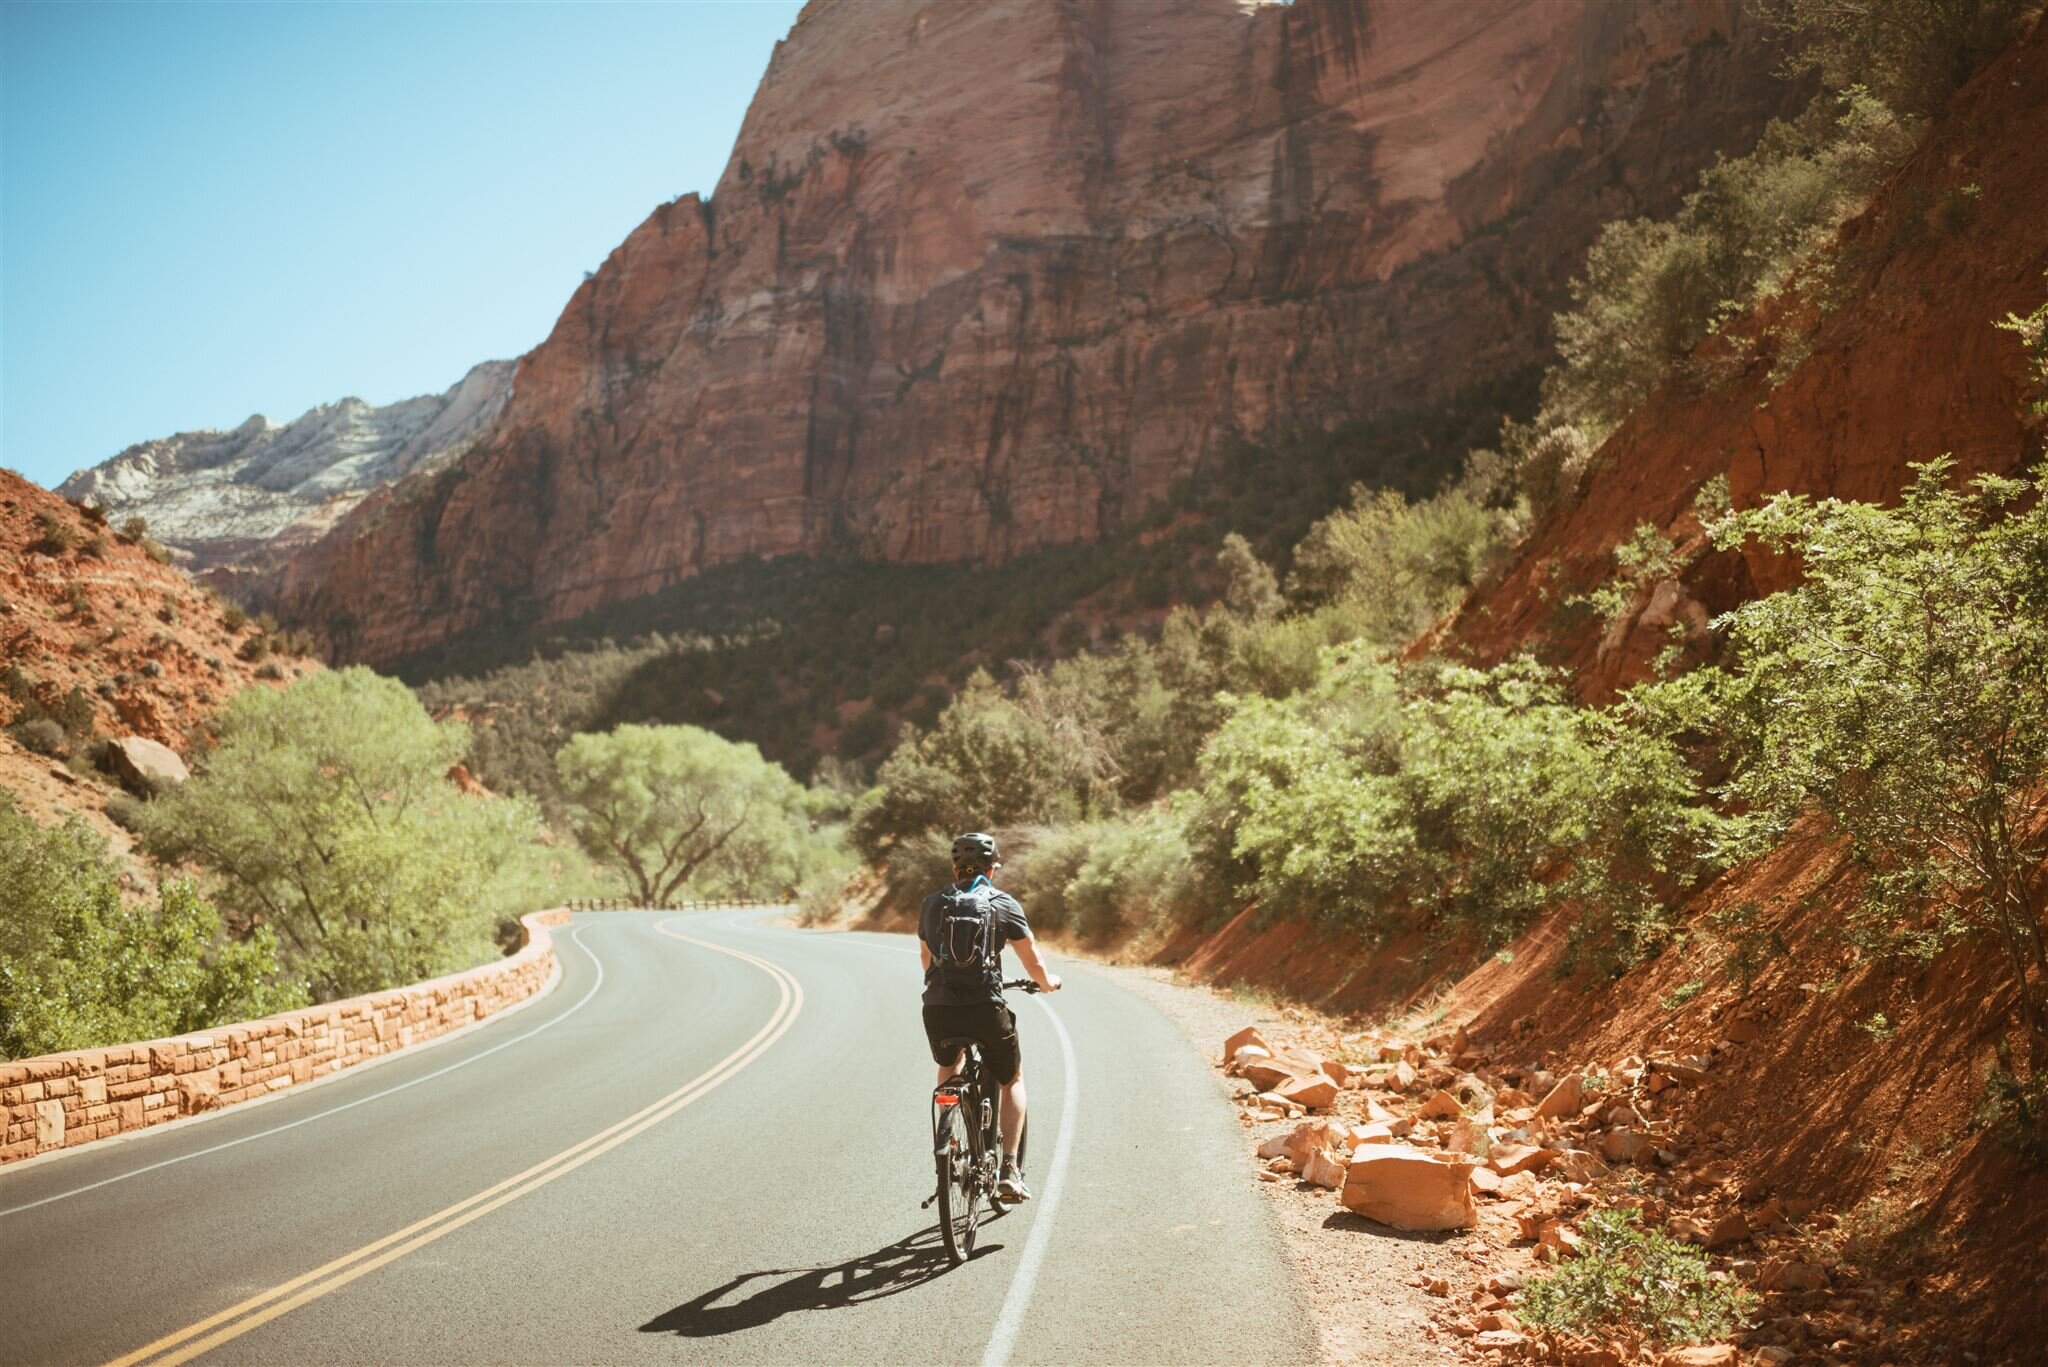
For your second full day in Zion, I really recommend renting bikes. It ended up being one of our favorite parts of the entire trip — not because it was dramatic or difficult, but because it slowed everything down in the best way.
The main scenic drive through Zion Canyon is closed to private vehicles most of the year, which means you either walk, bike, or take the park shuttle. Biking gives you more freedom than the shuttle and lets you stop when and where you want. If you can, go for an e-bike or pedal-assist — it makes the ride more relaxed and leaves more energy for wandering and short hikes.
Most rental shops are just outside the park entrance in Springdale and include helmets and locks. We did a few awkward test loops in the parking lot, then headed through the pedestrian entrance near Zion Outfitters. If you already visited the day before, just show your entry receipt or Parks Pass.
From there, the Pa’rus Trail leads gently toward the canyon, following the river and opening into wide views of the cliffs. The water glints in the sun, cottonwoods rustle along the banks, and the canyon walls rise so steeply they start to feel unreal.
At the end of the trail, you merge onto the scenic drive.
One important note: when a Zion shuttle comes up behind you, you’re required to pull over and stop completely (one foot down) and let it pass. The big green NPS shuttles always have the right of way. This doesn’t apply to private shuttles.
We stopped at the Zion Lodge for coffee and a light breakfast, then continued riding toward Temple of Sinawava, the final shuttle stop. There are plenty of pull-outs along the way to pause, take photos, or just sit quietly for a minute, letting the scale of everything sink in.
On the way back, we did a short hike and then lingered at the lodge lawn for a while. It’s shaded, breezy, and one of the nicest places in the park to take a break before heading back out. Lying on the grass, staring up at the sheer red walls of the canyon, felt like the right kind of stillness.
We returned the bikes in Springdale and spent the rest of the afternoon doing absolutely nothing in particular — which felt exactly right.

Day Five: Scenic Drive + A Change of Scenery
Today is a good day to either tackle another big hike or ease into something slower. For us, the decision was made for us — a sprained ankle turned “maybe we’ll do Observation Point” into “let’s just enjoy the views from the car.” And honestly, it ended up being exactly what we needed.
While much of Zion Canyon is closed to private vehicles, the eastern section of the park — the same side you enter from via the Mt. Carmel Tunnel — is open to cars. This stretch feels very different from the main canyon: quieter, more open, and less concentrated with crowds. The road winds through pale sandstone and wide, sloping formations, and the sense of scale shifts in a gentler, more spacious way.
One easy and rewarding stop is the Canyon Overlook Trail. Go early if you can, as it’s popular, but the payoff is a sweeping, layered view back into the canyon. The trail itself is short and not too strenuous, making it a good option even if you’re nursing tired legs or, in our case, a less-than-cooperative ankle.
After that, take your time driving this stretch of road. Pull off at viewpoints, wander where you’re able, and let the pace slow down. This side of the park feels like an exhale after the intensity of Zion Canyon proper.
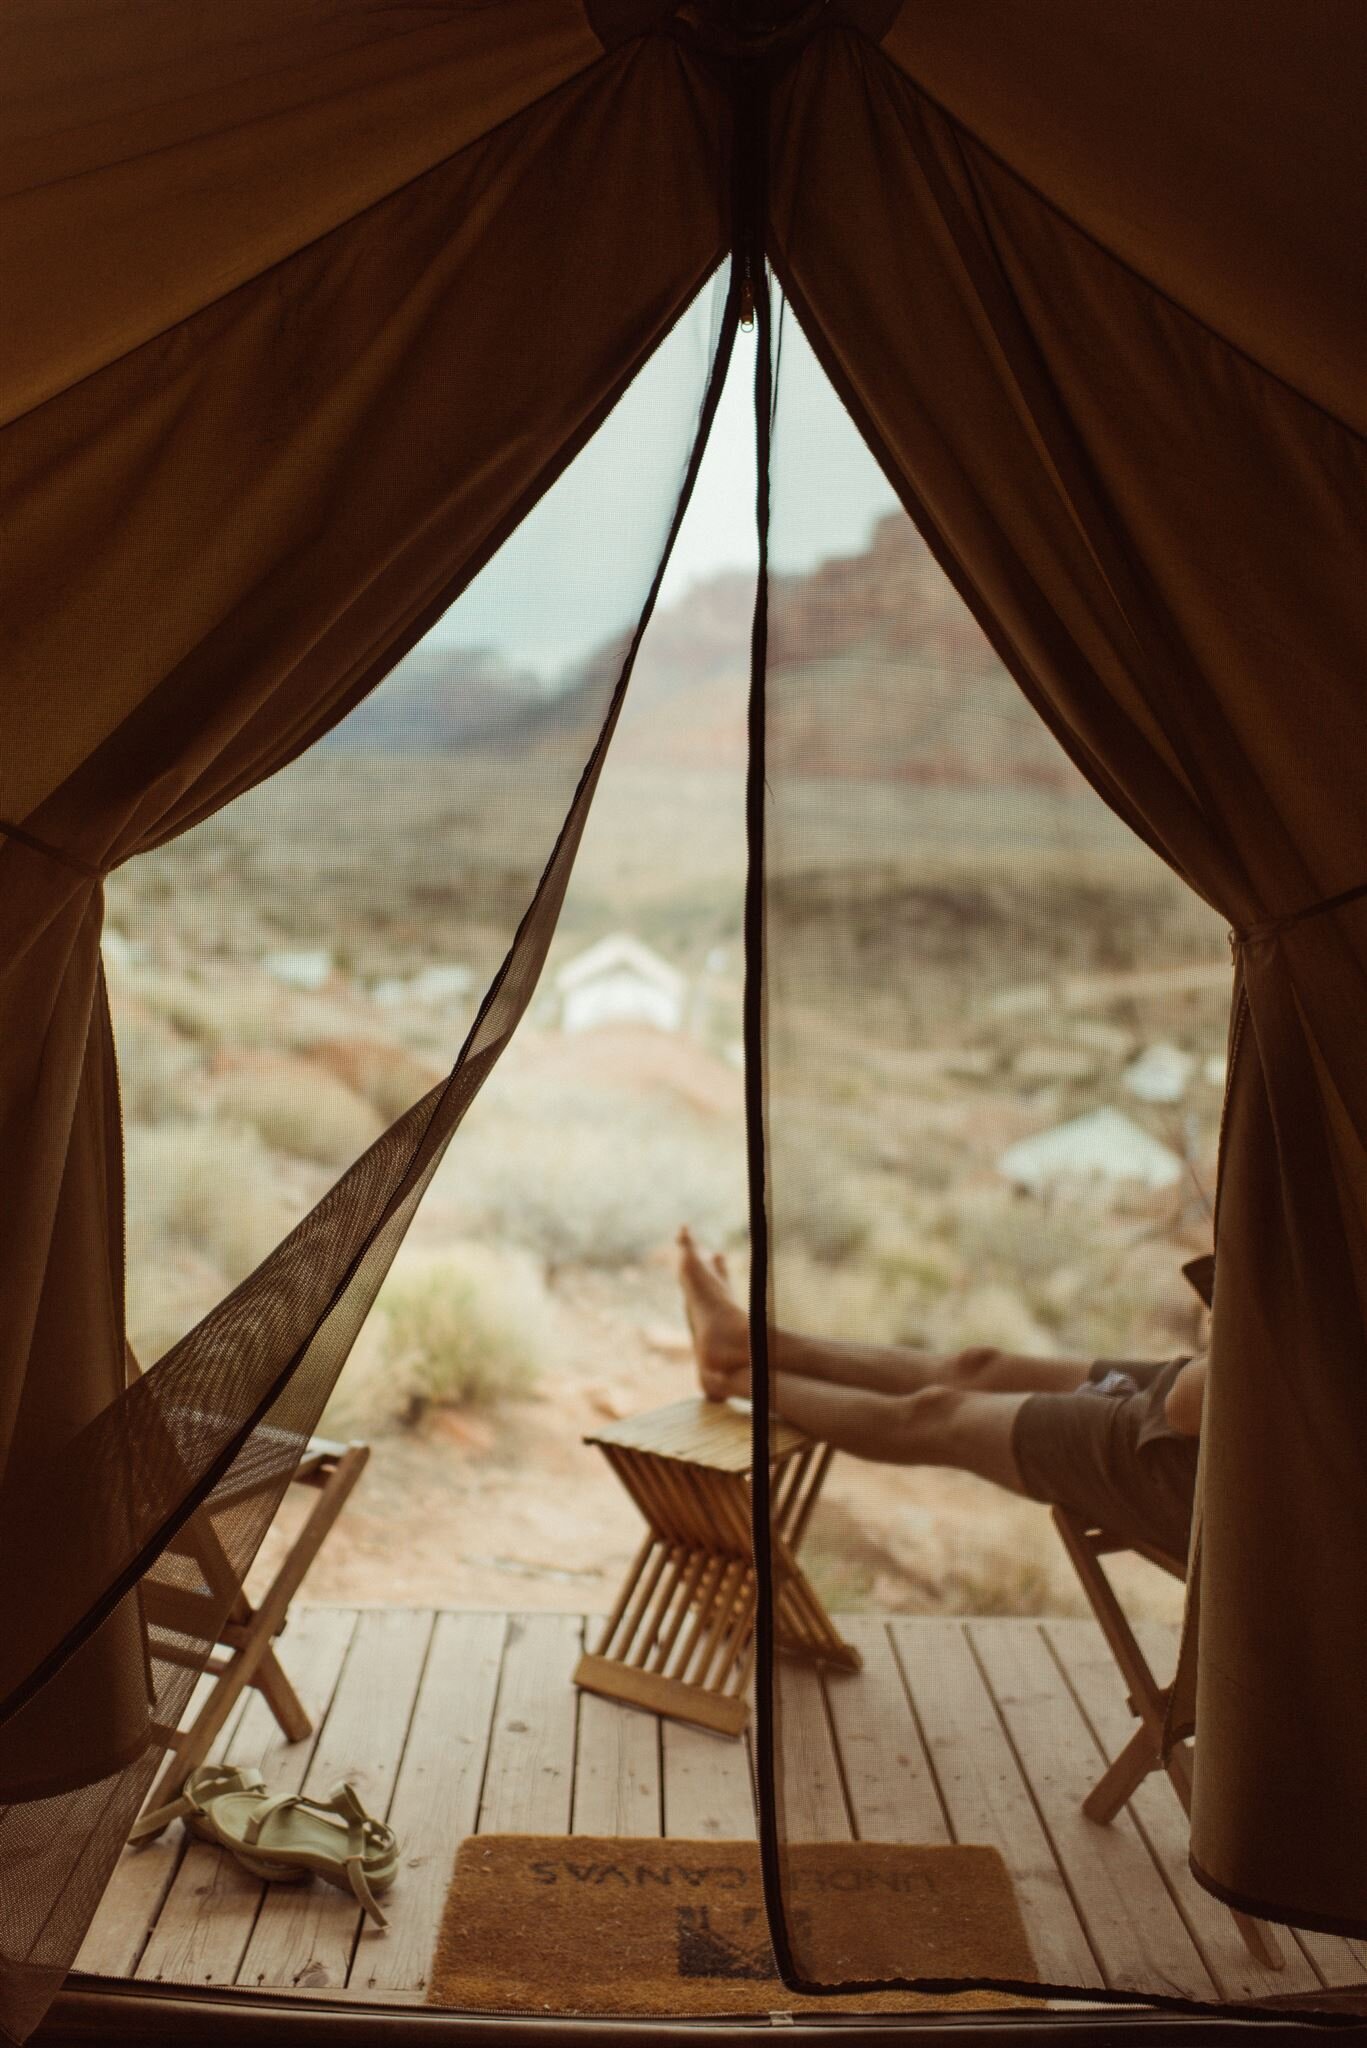
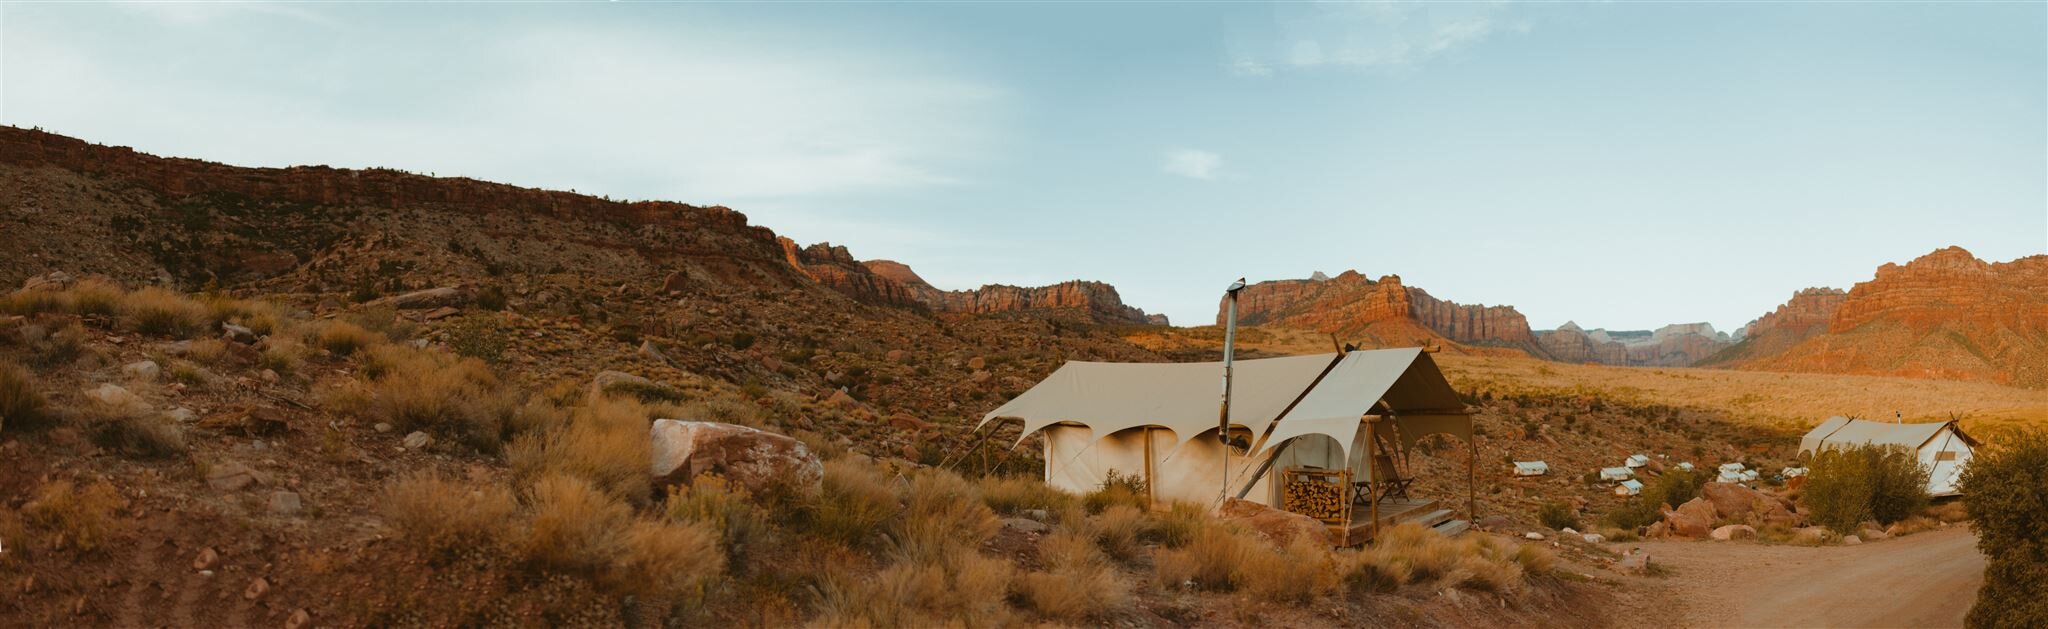
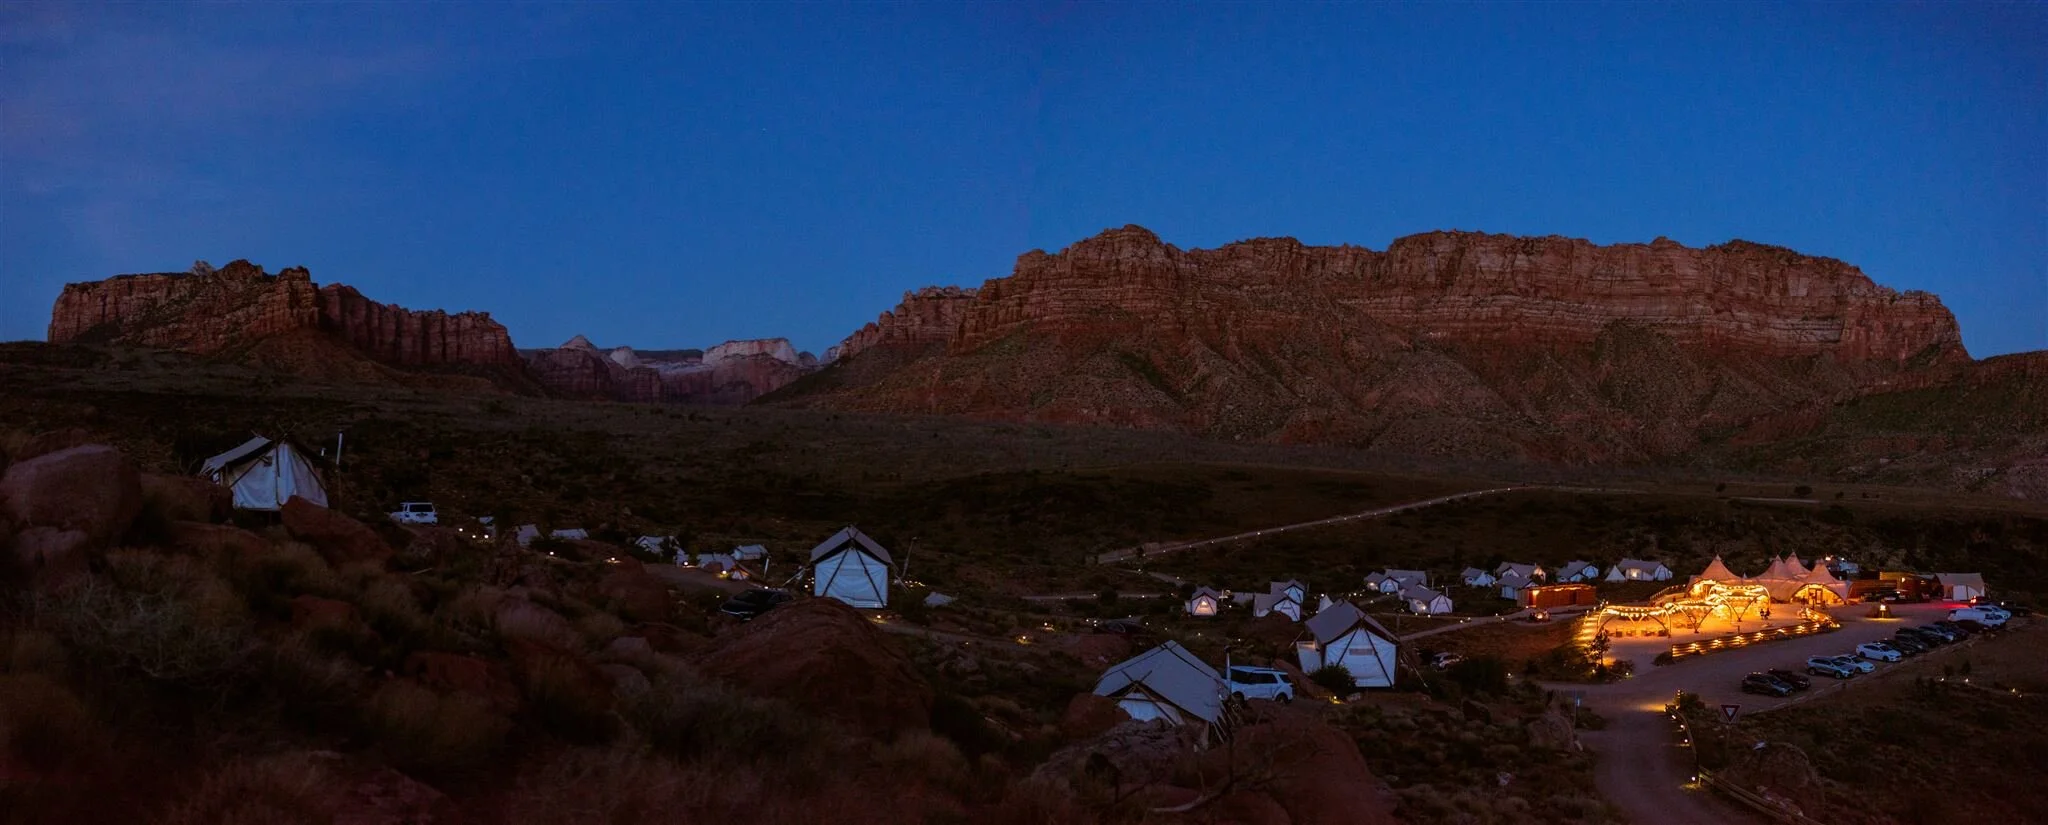
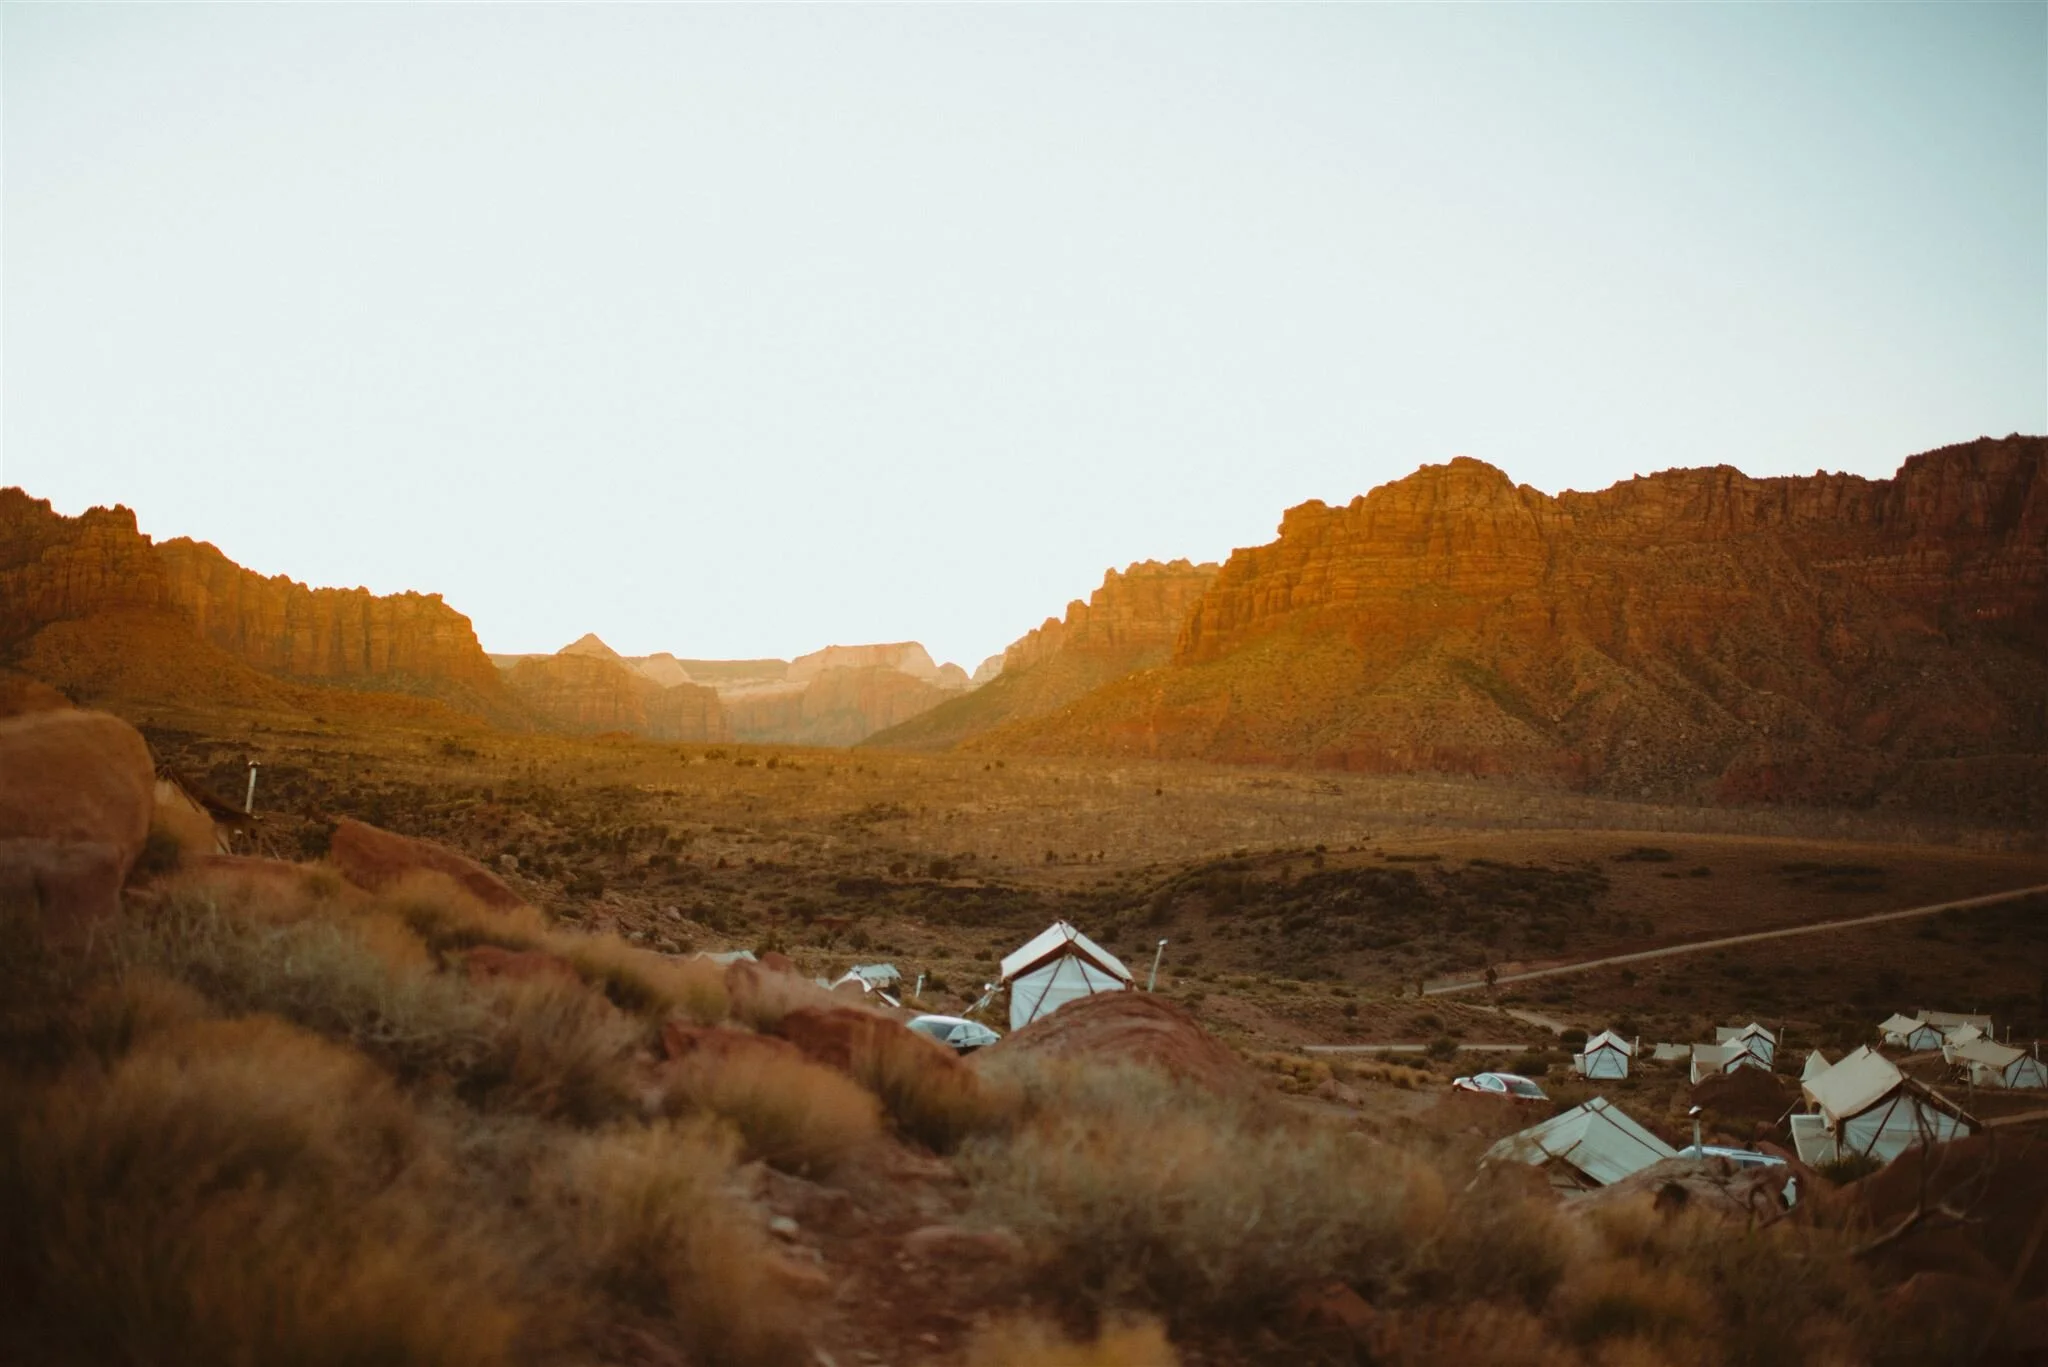
This is also a lovely moment in the trip to switch up your accommodations. Springdale is incredibly convenient for park access, but southern Utah has no shortage of memorable places to stay, and the end of the trip is the perfect time to try something a little special. We chose Under Canvas Zion for a bit of a splurge, and it turned out to be a beautiful way to wind down.
The property is tucked off Kolob Terrace Road — which, bonus, is also a gorgeous scenic drive in its own right. Plan to head that way a little early before check-in so you have time to explore. There are fewer crowds here, and if you’re up for it (or if your ankles are), there are some wonderful hiking options along the road. Sadly, we had to pass this time — but it gave us a good excuse to come back.
Once you arrive at Under Canvas, settle in and soak it all in. This is glamping at its finest—canvas tents, cozy bedding, starry skies, and plenty of space to just be. More details on what to expect below.

Day Six: Wind Down + Head Out
The last day. Not exactly the highlight of any trip—but depending on your flight time, there’s still room to fit in a little more before heading home.
By now, you’ve probably racked up a fair number of trail miles and dusty car hours, so it’s worth leaving this day a bit open-ended. You might want to squeeze in one more short hike—or you might just want a quiet morning and a real breakfast. Either way, don’t over-plan. Let how you feel decide.
Take your time checking out, linger over coffee, and enjoy your last bit of space before the drive back to Las Vegas (just under three hours). If you're up for a detour, Valley of Fire State Park is an easy stop along the way with short trails, striking red rock formations, and fewer crowds than the national parks. (Heads up: you’ll need cash or check for the entrance fee.) Another idea? Embrace the contrast and park the car for a quick wander along the Las Vegas Strip—just long enough to marvel at the chaos, grab a snack, and wonder how it’s possible to miss red rocks already. Then it’s off to the airport, probably a little dusty, hopefully satisfied, and already thinking about the next trip.
Where To Fly Into
Las Vegas Harry Reid International Airport (formerly McCarran) is your best bet. From here, it’s about a 4-hour drive to Bryce Canyon and just under 3 hours to Zion National Park. The rental car center is a short shuttle ride from the terminal—easy and efficient.
Where To Stay
Bryce Canyon City
Best Western Plus Bryce Canyon: Where we stayed. Located just outside the park entrance, walking distance to a few restaurants and a grocery store. The rooms were fine—pretty standard—and definitely on the noisy side (think: your neighbors' conversations becoming your bedtime stories), but honestly, we didn’t mind. The breakfast was surprisingly solid, with hot options, and there’s a water bottle filling station in the lobby.
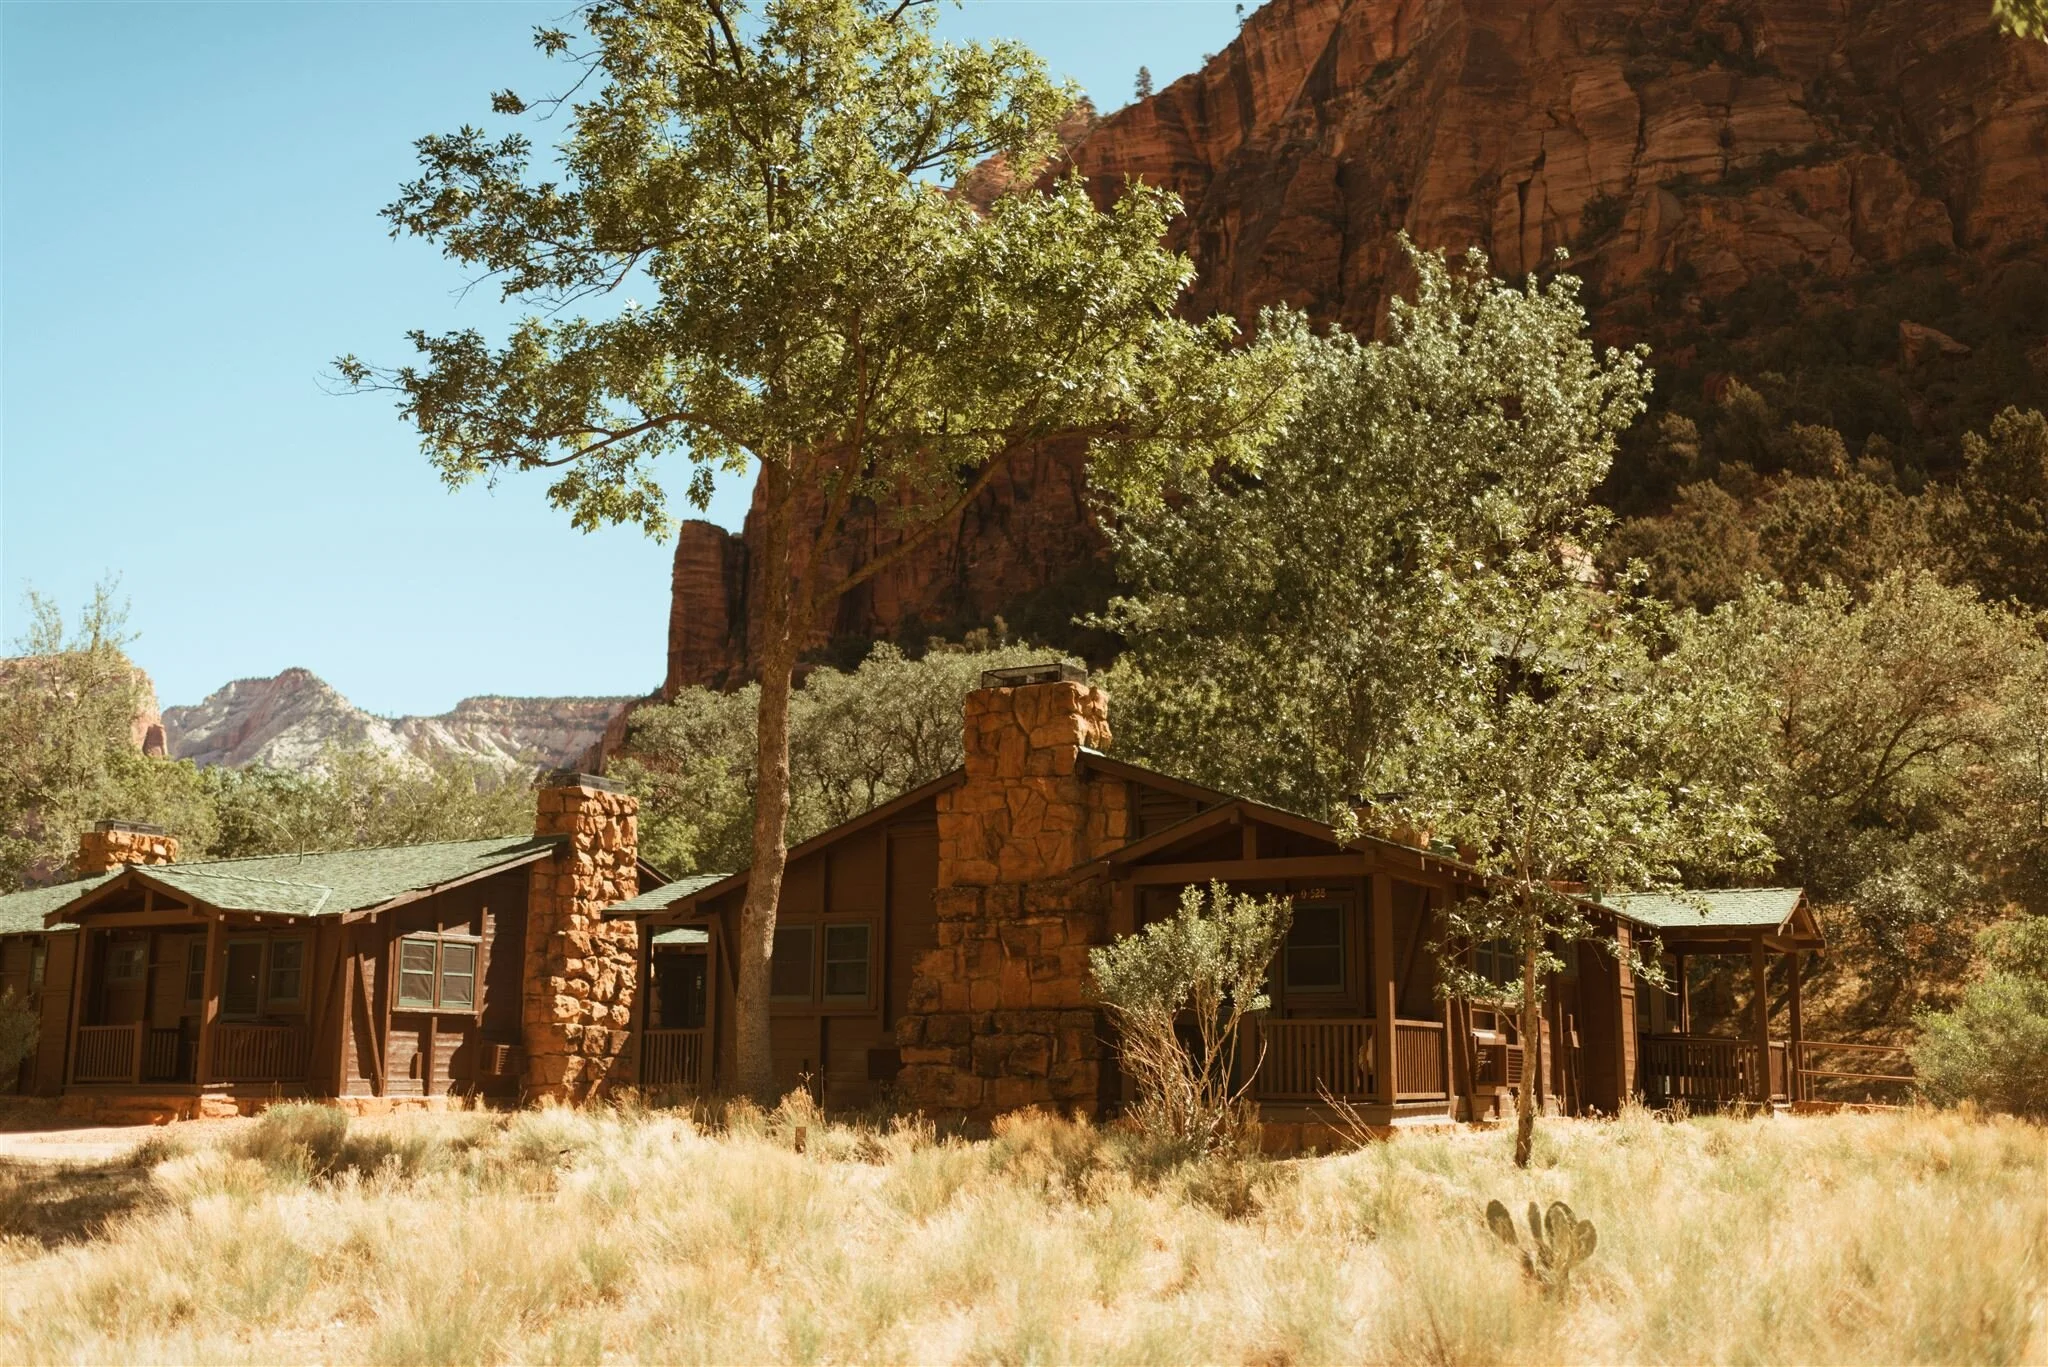
Bryce Canyon Lodge: Historic lodge and cabins located inside the park, right near Sunrise and Sunset Points. We didn’t stay here but the location can’t be beat.
Ruby’s Inn: Great location with an attached general store—good for snacks, postcards, or a forgotten toothbrush.
Bryce View Lodge: Located next to the Best Western, offering similar convenience.
North Campground: 99 sites, first-come, first-served (spring through fall). 30 sites stay open year-round.
Sunset Campground: 100 reservable sites (April–October) through recreation.gov.
Springdale
Holiday Inn Express: Where we stayed. Great location with canyon views—especially if your room faces the back. There’s a small pool and fire pit out back, and it’s within easy walking distance to everything in Springdale. The breakfast is… functional (grab-and-go options, not much more). Bonus: pet-friendly and a water bottle filling station in the lobby. Note: the bathroom setup is a little quirky—sink in the main room and a dark shower—but nothing that would stop us from staying again.
Under Canvas Zion: Where we stayed our last night—and it was a splurge-worthy way to end the trip. Located off Kolob Terrace Road, this “glamping” spot offers canvas tents, wood stoves, lanterns, and full-on desert views. We booked a tent with shared bath, but were upgraded to one with a private bathroom (thanks, COVID policies). No electricity or Wi-Fi in the tents, but you’ll have USB ports, hot water, and lanterns. The on-site café serves meals and coffee, and there are evening campfires, live music, and outdoor games. Pro tip: don’t plan to hang in your tent mid-day—it gets hot - like sealed in a ziploc bag in the desert hot. This is definitely not roughing it—but it’s also not luxury hotel-level convenience. Perfect if you want something different.
Other Options in Springdale
Best Western Plus Zion Canyon Inn & Suites
La Quinta Inn & Suites by Wyndham
SpringHill Suites
South Campground: Near the south entrance. Minimal shade, but has flush toilets and drinking water. No showers or electricity.
Watchman Campground: Similar amenities, also near the south entrance. Reservations highly recommended.
There’s no shortage of places to stay near Zion—whether you want a hotel, cabin, or campground, there’s something for every style and budget.

Where to Eat
Bryce Canyon City
Ruby’s Inn General Store: For snacks, groceries, and souvenirs.
Ruby’s Inn Cowboy’s Buffet & Steakroom: Classic, no-frills option.
The Lodge at Bryce Canyon: Dining inside the park.
Canyon Diner: Quick bites.
Springdale
Zion Pizza & Noodle Co.: Where we ate. For when you are craving some pizza- which we generally, always are.
MeMe's Café: Where we ate. Lot’s of good options and something to suit everyone on the menu. Great if you love crepes!
FeelLove Coffee Zion: Where we ate. Solid coffee stop near the park gates. Harder to find the basics on the menu, but a good espresso hit.
Sol Foods Supermarket: Where we ate. Great stop for snacks, trail food, or a DIY hotel meal.
Springdale Candy Company: Where we ate. Great stop for icecream just outside the park.
Deep Creek Coffee Co: Offering coffee, tea, breakfast & lunch
Cafe Soleil: Coffee, tea, breakfast, lunch, and dinner
Thai Sapa: Asian & Thai food

Must-Do Hikes & Must-See Sights
Bryce Canyon
Queen’s Garden & Navajo Loop Trail: If you only have time for one hike, make it this. Just under 3 miles, easy to moderate, and full of the park’s best scenery—hoodoos, red rock, switchbacks, and sweeping views.
Bryce Canyon Scenic Drive: Stop at as many viewpoints as you can.
Ruby’s Inn General Store: Shop for snacks, souvenirs or even mail a postcard at the tiny post office - this place was fun to poke around.
Bryce Canyon Visitor Center: Learn about the park’s geology and history, and pick up ranger tips or park souvenirs.
Zion Region
The Narrows: Iconic, wet, and unforgettable. A strenuous river hike that’s up to 9.4 miles round-trip. Rent gear or go with what you’ve got—just check conditions first.
Angels Landing: Not for those with a fear of heights. Permit required. 5.4 miles round-trip with jaw-dropping views.
Canyon Overlook Trail: Short (1 mile), beautiful, and worth the stop near the Mt. Carmel Tunnel.
Zion Canyon Scenic Drive & Mt. Carmel Tunnel: Breathtaking from start to finish.
East side of Zion National Park: A completely different landscape—and often less crowded.
Zion National Park Visitor Center: Orient yourself, talk with rangers, shop, or hop on the shuttle.
Bike Rentals: Our favorite way to see Zion!
Zion Cycles: Where we rented from. Smooth process, great e-bikes. Reserve ahead of time—especially for pedal-assist bikes.
Zion Guru: Rents RadRunner bikes. Also on the main stretch in Springdale.
Zion Outfitter: Closest location to the pedestrian entrance of the park. Offers bikes and tons of other gear.


What to Skip
Zion
Emerald Pools Hike: We did the lower, middle, and upper pools and… honestly, we wouldn’t do it again. In the afternoon, it was hot and crowded and I never love a crowded hike. Not terrible, just not worth prioritizing—especially when there are better, more scenic options nearby.